
The Cleaning
Dust spots on your D-SLR’s sensor appear as tiny black specks on the image. There’s a good chance you haven’t noticed the specks—they may only show when you’re shooting a bright subject (such as the sky), if shot at a small aperture. But if those specks have annoyed you, you might remove them from your image using image-editing software like Photoshop. You may also eliminate them from future shots by cleaning your D-SLR’s sensor.
Several sites on the web illustrate the effects of dust on the sensor (see our Links page). Many also provide cleaning and testing techniques. We’ve tried to learn from these sites as well as from the input we got from manufacturers. For a good test of your sensor’s health, see our link, How To Make Your Own Tools. From the sheer number of sites, dust on the D-SLR’s sensor may seem like a major problem. It isn’t—film cameras have a much bigger problem with dust on the negative you’re trying to print.
As long as you keep the front end of your D-SLR sealed—either with a lens or with a body cap—you may never have an objectionable dust problem. When you change lenses, try to use a clean area. When you’re shooting outside or on the move, however, that’s not always possible. With the lens removed, dust can enter the camera and migrate to the sensor. Some say the sensor attracts dust because of its electrical charge. Maybe so. But one thing’s for sure—the sensor provides the most objectionable place for the dust to settle.
It’s a good idea to read through the other sites as well—besides providing different techniques, they give you an appreciation of the dangers in cleaning your own sensor. It’s not that the procedure is so difficult—it’s that the cost of a mistake is so high. If you damage the sensor, expect the repair to cost almost as much as the camera. That’s why you see so many disclaimers, both from the factories and from the web sites. Some manufacturers say you should never attempt to clean your own sensor—always let a factory-authorized repair facility do the job but that can get expensive. Plus there’s the down time when you don’t have your camera. Other manufacturers go the opposite route—some even provide sensor-swabbing instructions in the operator’s manual.
Your chances for success are greatly improved by using the proper materials and techniques. You should always work in as clean of an environment as possible—the cleaner the work area, the better your chances for success. To clean the sensor, you must lock up the mirror and hold open the shutter. Now your sensor is more exposed to dirt than ever. If you’re working in an area that isn’t clean, your sensor may end up with more dirt after cleaning than it had before. Good lighting is also important to check the results of each cleaning step.
Please do not attempt to clean your own sensor if you don’t have the proper materials and work area or if you have any hesitation about your own abilities. Do you have a steady hand? Relatively good eyesight? If not, you might want to have a professional clean your sensor. That can be expensive but it’s not even close to the cost of replacing the sensor in your camera.
Since we can’t watch you work—and we know nothing about your qualifications—we can’t guarantee success. Nor can we be responsible in any way for damage—this material is provided at no charge for your information only. Anytime you expose or touch the sensor, there’s a chance of scratching the filter or causing other damage. Anytime you lock open the shutter, it’s possible to end up with even more dust on the sensor. Some photographers clean the sensor as routinely as they clean the lens. But a few have caused damage that requires replacing the sensor. For some, the danger outweighs the benefit.
If you’re determined to clean your own sensor, we want to offer you the best materials and instructions we can. We believe that the blow-and-swab procedure described here provides the best results outside of a factory facility—at least for most people. Blowing off the sensor sets the stage for swabbing the sensor.
Dry Method
Items needed to complete this task: Hand Blower, an Inspection Device or Computer and your Digital SLR Camera Body. Recommended Optional Items: SensorKlear® and/or D-SLR Brush.
- Choose a room or location where fans aren’t blowing and where dust is at it lowest to accomplish this task.
- Per the instructions in the owners’ manual for your camera, place your camera into its “cleaning mode.”
- Inspect your sensor for dust. If there is no dust, you want to stop now. As the saying goes, “if it's not broken, don’t fix it.” See our Inspecting For Dust page for tips and tricks on inspecting the sensor.
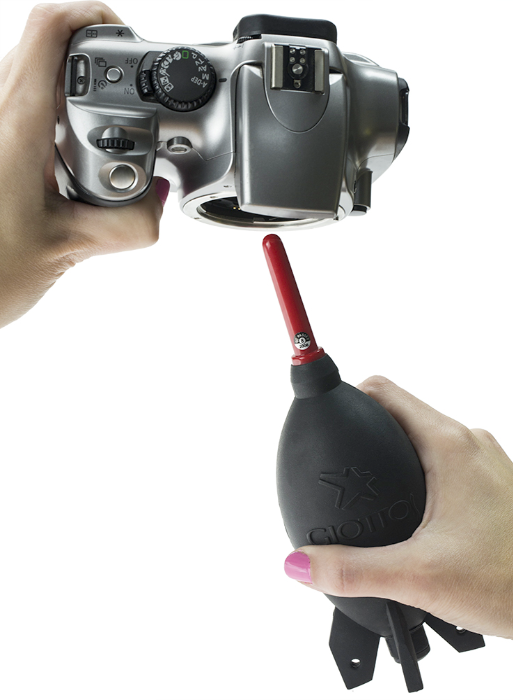
- Holding your camera so that the lens mount is facing downward, use a quality hand blower to remove particles from your sensor. With the blower, use a sweeping motion to help dislodge
the particles.
- Do Not place the nozzle of the blower inside the body of your camera.
- You can repeat this step multiple times. We would recommend doing so as this is the easiest and least invasive method of sensor cleaning
- If you are fortunate to not have dust that is stuck to the sensor by static, moisture or pollen, it is actually possible to have a clean sensor at this point.
- Dust that is held on by moisture or pollen is commonly referred to as "welded dust".
- If your kit contains a D-SLR Brush™, use the D-SLR Brush™ method at this point. (see separate D-SLR Brush™ instructions)
- If your kit contains a SensorKlear® by LensPen®, you can try this method at this point.
- Never use the brush of a LensPen® on your sensor. Use only the foam cleaning tip.
- Remove cap covering the carbon impregnated clean tip.
- With little to no pressure, in a swirling motion, try to clean the spot in question.
- We find it almost always necessary to use a hand blower after using a SensorKlear® so we always follow up with the hand blower before inspecting.
- You can repeat this step a couple of times but if it doesn’t come clean after one or two tries we suggest moving onto a wet cleaning.
Wet Method
We recommend using the dry method first. At the bare minimum, you must use a blower before using the wet method.
You should use very minimal pressure when cleaning cameras that have sensors with built-in image stabilization (like the Sony A7R II). Excessive pressure can damage the sensor.
Items needed to complete this task: Hand Blower, multiple appropriately sized sensor cleaning swabs, cleaning fluid, an inspection device or computer and your Digital SLR Camera Body.
- Complete steps 1-4 of the Dry Method.
- Make sure you have the appropriate size sensor cleaning swab for your specific camera.
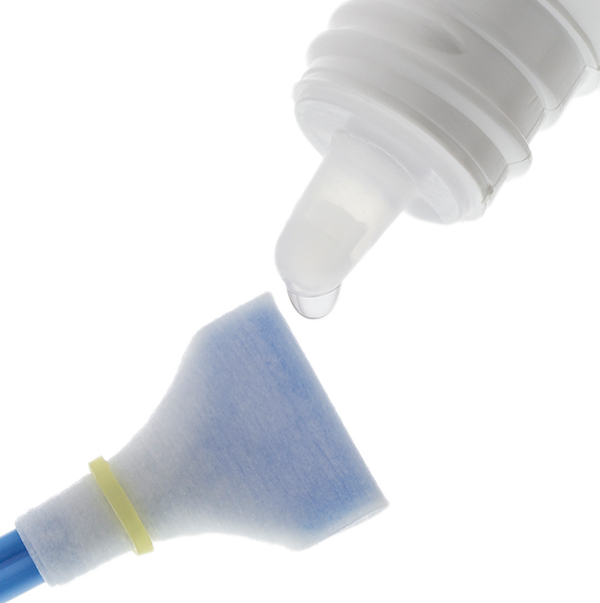
- Using your cleaning fluid, place 2-3 drops on the tip of the swab. It’s not important to get the sides of the swab moist, as you are only using the tip for the cleaning process.
- Most cleaning fluids evaporate fairly rapidly so you need to be ready to clean right after applying the solution. Your camera should be in its cleaning mode before you place the solution onto the swab.
- For best results, less is more. You just want it slightly moist, not sopping wet. Placing too much chemical on the swab may cause streaking. Streaking or smearing can be cleaned by using a new swab with less optical cleaner. Using more than the recommeded ammount of any type or brand of sensor cleaning fluid can damage your sensor.
- Without delay, start from either the left or right side of the sensor. Swab softly all the way across and then back the other direction in 1 fluid motion, without lifting the swab off of the sensor (four thirds cameras go from top to bottom instead of side to side). Discard the swab as it should never be reused.
- Inspect the sensor.
- It is not uncommon to need to repeat steps 2-4 multiple times with a fresh swab. Never reuse a swab.
- If the particles are removed, but you see a film left behind because too much fluid was used, you can use your SensorKlear® to remove the film.
- If you don’t have a SensorKlear® or it wasn't successful in cleaning up the over use of fluid, use a new swab with only one drop of fluid on it using steps 3-4.
Sensor Cleaning Instructions CDC.pdf
Adobe Acrobat document [1.5 MB]